Ready to start learning to fix my Fiat...what's step one?
-
Klayfish
Re: Ready to start learning to fix my Fiat...what's step one?
Great, thanks guys!!! I'm all set to give it a shot. I'll let you know what happens. Probably won't get time to try it until the weekend, it's almost dark already by time I get home from work.
-
So Cal Mark
Re: Ready to start learning to fix my Fiat...what's step one?
I suggest ATF since it will burn easily, oil will foul the spark plugs
- RoyBatty
- Posts: 852
- Joined: Sat Aug 28, 2010 11:44 pm
- Your car is a: 1975 124 Spider - 1971 124 Sport Coupe
- Location: Locust Grove, VA
Re: Ready to start learning to fix my Fiat...what's step one?
Man! you all missed the most obvious thing for the new guy....
http://www.gambino.com/curse.htm
My apologies if you are easily offended .
Naaa not so much.
http://www.gambino.com/curse.htm
My apologies if you are easily offended .
Naaa not so much.
-
Klayfish
Re: Ready to start learning to fix my Fiat...what's step one?
OK, a couple of questions. And I know they're silly, but remember this is my first try at any of this.
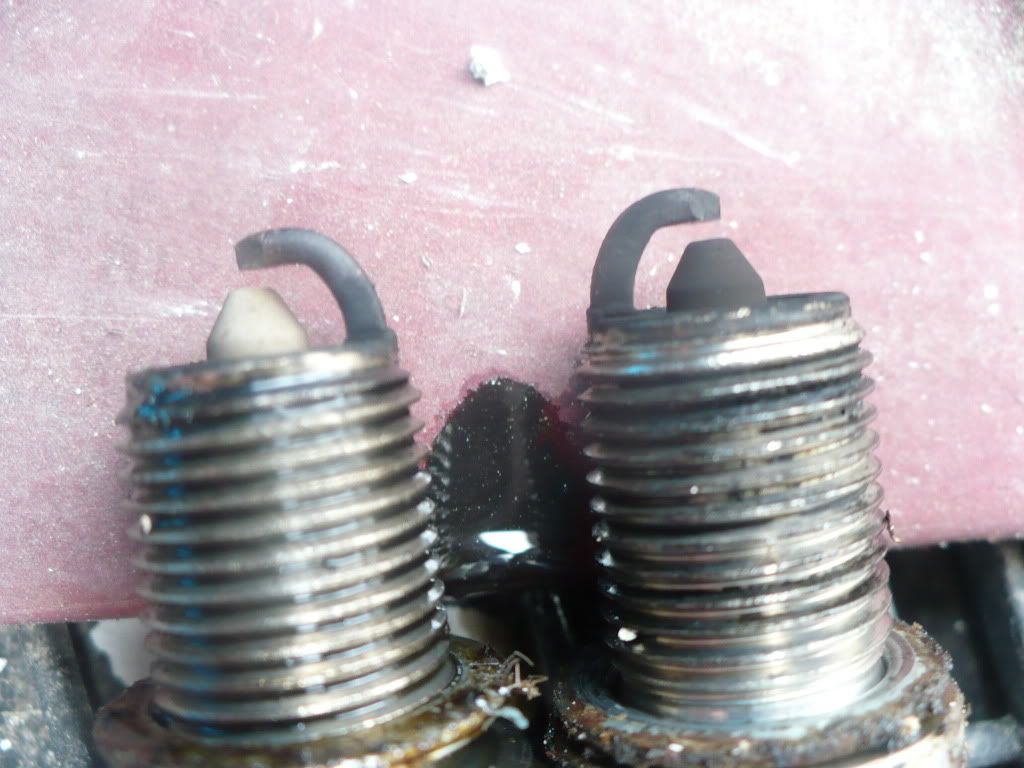
So I've got the battery out to go get a new one. I took my leaf blower and got all the debris off the top of the engine. Pulled the plugs (interesting...one is real dark color, the other three look almost new) and put a tiny bit of ATF in each cylinder. Have the plug holes covered to prevent debris from getting in.
I'm heading out to the store now for a new battery and a giant socket to attach to the crank so I can spin it by hand. I think the socket is 1 1/2", correct? Here are my questions....
Which way do I spin the motor, clockwise or counter? I want to be sure?
Before I do that, I want to check to make sure the timing marks are lined up. Can you help me make sure I'm looking at the right things?
Steve
P.S. Roy, thanks for that link. I'm going to memorize those, so that when I get really pissed off trying to work on the car and my 3 little children are watching me, they'll have no idea what I'm saying....
-
narfire
- Posts: 3959
- Joined: Sat Dec 27, 2008 2:14 am
- Your car is a: 1980 124 spider
- Location: Naramata B.C.
Re: Ready to start learning to fix my Fiat...what's step one?
Spin the motor clockwise as you are looking at the front. Sometimes going the other way the belt can slip on the cam wheels ect.
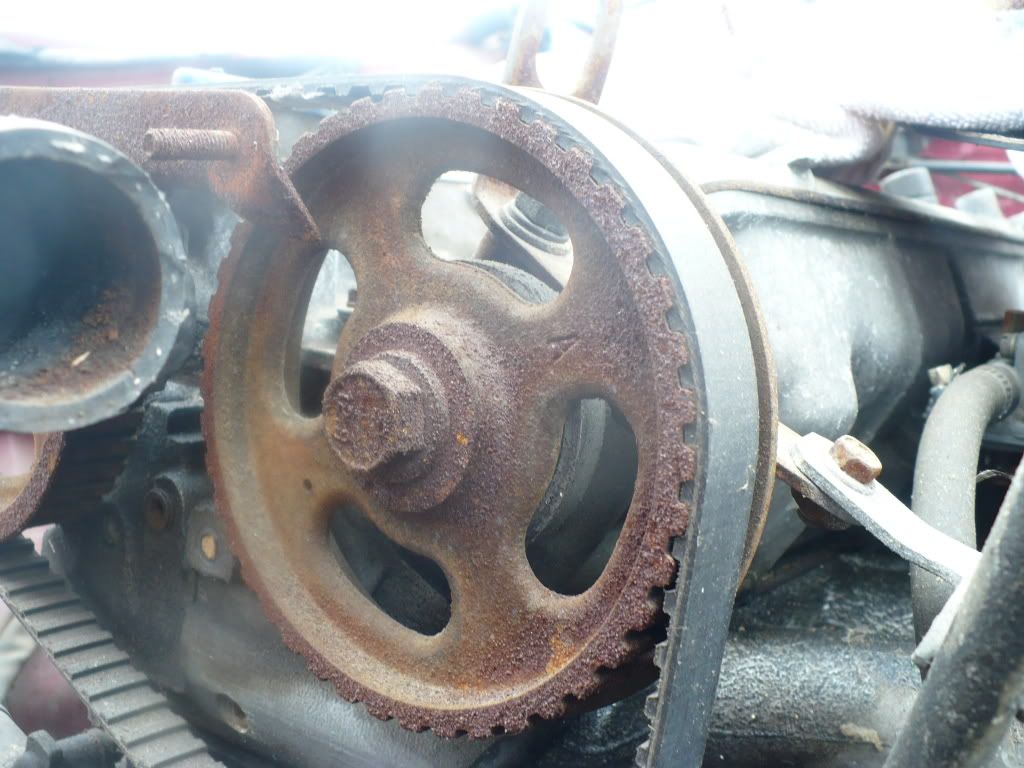
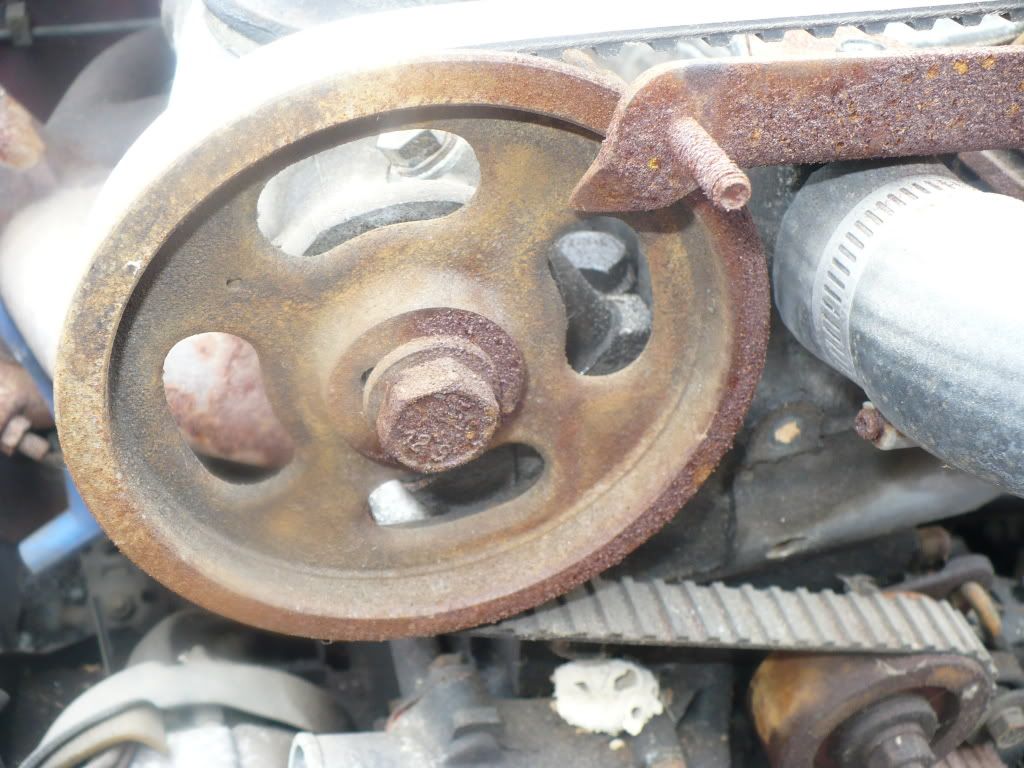
To check if it is all lined up,both the cam wheels will/should have a small hole that should line up with the pointers that are attatched to the water conection. The crank wheel will have a little notch in it that should line up with the marks on your timing belt cover. Line up with 0 deg mark... the longest mark on the cover. I guess you'll have to slide the cover back on for that. Also the aux shaft should be set corectly as well. Again there should be a small hole in it and when the other marks are lined up, the aux shaft mark should be around the 1 o'clock position I believe. This can prevent any interference with the #2 conecting rod and the lobe(used for the mechanical fuel pump) on the end of the aux shaft comming in contact with each other.
Have fun, looks like a project that will keep you entertained
Chris
80 FI spider
72 work in progress
2017 Golf R ( APR Stg. 1)
2018 F350 crew long box
72 work in progress
2017 Golf R ( APR Stg. 1)
2018 F350 crew long box
-
Klayfish
Re: Ready to start learning to fix my Fiat...what's step one?
Thanks. When you say pointers attached to the water connection, can you clarify? I checked the Haynes manual and it stated there is a "top support bracket for timing cover - wither pointers to indicate timing". That bracket is attached to the car. In the picture in Haynes, it shows the pointers on the bracket pointing to an "A" on the inlet camshaft and an "S" on the exhaust. I can't find the S on the exhaust, and the "A" isn't lined up with that pointer. I tried to take photos. Should I assume the timing is way off?


Steve


Steve
-
Klayfish
Re: Ready to start learning to fix my Fiat...what's step one?
Update....
Actually, after double checking the Haynes diagram and a diagram Artigue had written up, I realized that the tiny holes in the cam wheels did line up with the marks on the pointer. Obviously, when you shut the engine off, it doesn't always stop in the exact position where the holes in the wheels are right at the top of the pointer. So a half rotation of the crank and the holes lined up perfectly (I hope I described that right). I cranked the motor by hand, and it turned nice and free. No funny noises, snags or anything. I turned it 2 or 3 full rotations to help the ATF soak in (I had let it soak several hours before doing this).
So here's what I accomplished today....
Pulled the plugs, dropped ATF in.
Changed plug in cylinder 2. It was pretty sooty, I'll post a picture of it at the bottom of this thread. It's next to cylinder 1 plug. Plugs 3 and 4 looked just like 1.
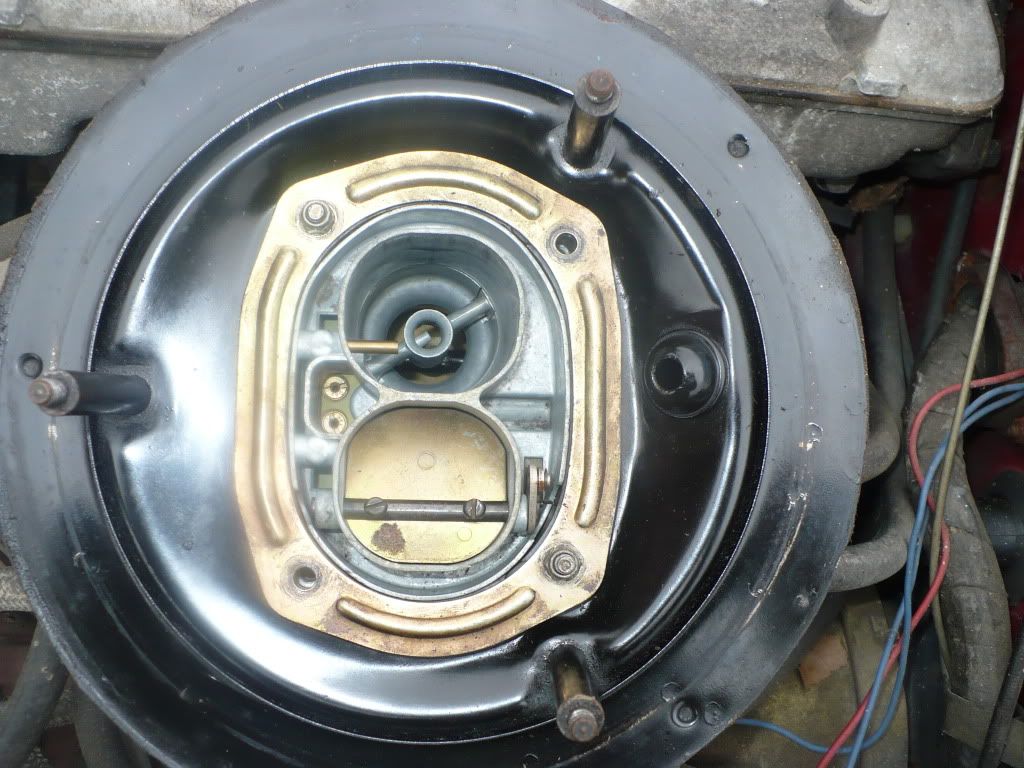
Pulled air cleaner top off to clean up. I'll also post a picture of the carb looking down from the top.
Turned engine by hand.
Changed battery.
At that point...with fire extinguisher at the ready, put the key in and gave it a turn. Heard the electric fuel pump clicking away, and the starter cranked perfectly. The motor never sputtered or seemed like it was going to start, but it spun fine. I saw the oil pressure guage go to 20lbs as it was cranking (I checked the oil before I cranked), but the fuel gauge didn't register anything, as if tank was totally empty (which it isn't...I put a tiny bit in).
All in all, I'm very pleased with today, having never done anything beyond oil changes. Now on to the next step. I'd assume I'd want to put the v belt back on and the radiator back on, and try to get the engine to actually run. Thanks for everyone's advice, I really appreciate it. Makes it so much easier!!!!


Actually, after double checking the Haynes diagram and a diagram Artigue had written up, I realized that the tiny holes in the cam wheels did line up with the marks on the pointer. Obviously, when you shut the engine off, it doesn't always stop in the exact position where the holes in the wheels are right at the top of the pointer. So a half rotation of the crank and the holes lined up perfectly (I hope I described that right). I cranked the motor by hand, and it turned nice and free. No funny noises, snags or anything. I turned it 2 or 3 full rotations to help the ATF soak in (I had let it soak several hours before doing this).
So here's what I accomplished today....
Pulled the plugs, dropped ATF in.
Changed plug in cylinder 2. It was pretty sooty, I'll post a picture of it at the bottom of this thread. It's next to cylinder 1 plug. Plugs 3 and 4 looked just like 1.
Pulled air cleaner top off to clean up. I'll also post a picture of the carb looking down from the top.
Turned engine by hand.
Changed battery.
At that point...with fire extinguisher at the ready, put the key in and gave it a turn. Heard the electric fuel pump clicking away, and the starter cranked perfectly. The motor never sputtered or seemed like it was going to start, but it spun fine. I saw the oil pressure guage go to 20lbs as it was cranking (I checked the oil before I cranked), but the fuel gauge didn't register anything, as if tank was totally empty (which it isn't...I put a tiny bit in).
All in all, I'm very pleased with today, having never done anything beyond oil changes.


-
majicwrench
Re: Ready to start learning to fix my Fiat...what's step one?
I'm an impatient sort and would want to hear it roar, for nothing will inspire you more.
Put a tiny amount of gas down the barrels of the carb...fill the cap from an oil container 1x should about do it,,, and crank er again. See what happens. Good luck!
Put a tiny amount of gas down the barrels of the carb...fill the cap from an oil container 1x should about do it,,, and crank er again. See what happens. Good luck!
-
2ndwind
- Posts: 548
- Joined: Tue Oct 27, 2009 10:17 pm
- Your car is a: 1982 Spider
- Location: Cincinnati OH
Re: Ready to start learning to fix my Fiat...what's step one?
Steve,
Good going so far. I recommend following magicwrench's advice with a bit of gas down the carb. first. Or just spray some starting fluid down there. Run for 10 seconds or less. Attach radiator, hoses, and fill with coolant. Follow the procedures for filling as are in the archives on this site. Personally, I just jack up the front end so the radiator fill is significantly higher than the rear heater hose, squeeze all hoses to get bubbles out, recap, lower car and run.
I would not use the original gas tank yet. Disconnect the fuel intake and run a fuel line into a gallon can as suggested above. With radiator and coolant in, you can run for a while to determine if the fan will come on at 190 degrees or starts to overheat.
Steve
1982 Red Spider 2000
1919 Old Town Sailing Canoe
1982 Red Spider 2000
1919 Old Town Sailing Canoe
-
Klayfish
Re: Ready to start learning to fix my Fiat...what's step one?
I'd love to try to get it to fire today...but if I open the hood, the only thing that'll go down the carb is a ton of water. It's pouring here in PA today.  This car is stored outside (my orange Spider is in the garage).
Yeah, the fuel tank still has to be drained, checked, cleaned, etc....
Once I get it to fire, then I'll work on reassembly of the engine.
Yeah, the fuel tank still has to be drained, checked, cleaned, etc....
Once I get it to fire, then I'll work on reassembly of the engine.
-
Klayfish
Re: Ready to start learning to fix my Fiat...what's step one?
Just wanted to post an update on this. Yesterday was a sunny day and I made it home from work a few minutes before it got dark outside.
IT LIVES!!!!!!


I poured a capful of fuel down the carb, hooked up the battery and gave it a go. The engine turned over a few times, sputtered just once and then instantly fired up. It only ran for about 6 or 7 seconds on the fuel I had put in the carb, but I was honestly shocked how smoothly it ran. I was expecting it to cough, sputter, etc...but it seemed to just idle at a nice hum. I was so excited, I had to try it one more time to make sure it really happened. Yep, it really ran. Same results. That's really cool to see.
Now to find a proper V belt for it, and put the radiator back in, so I can start working on trying to get it to run for an extended period.
Thanks everyone for helping a complete noob get this far!!
IT LIVES!!!!!!
I poured a capful of fuel down the carb, hooked up the battery and gave it a go. The engine turned over a few times, sputtered just once and then instantly fired up. It only ran for about 6 or 7 seconds on the fuel I had put in the carb, but I was honestly shocked how smoothly it ran. I was expecting it to cough, sputter, etc...but it seemed to just idle at a nice hum. I was so excited, I had to try it one more time to make sure it really happened. Yep, it really ran. Same results. That's really cool to see.
Now to find a proper V belt for it, and put the radiator back in, so I can start working on trying to get it to run for an extended period.
Thanks everyone for helping a complete noob get this far!!