Page 1 of 2

My cracked dash repair

Posted: Fri Mar 13, 2015 7:39 pm
by younkin1
Hello Everyone,

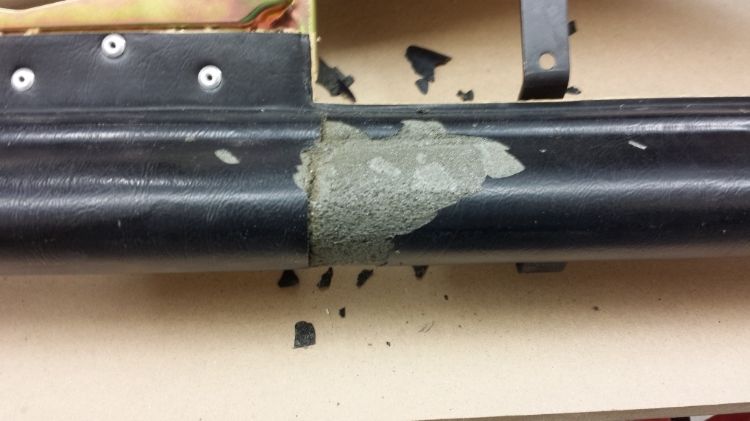
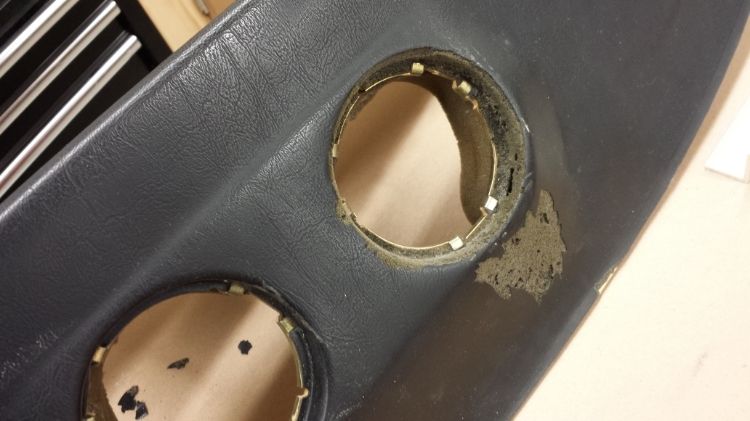
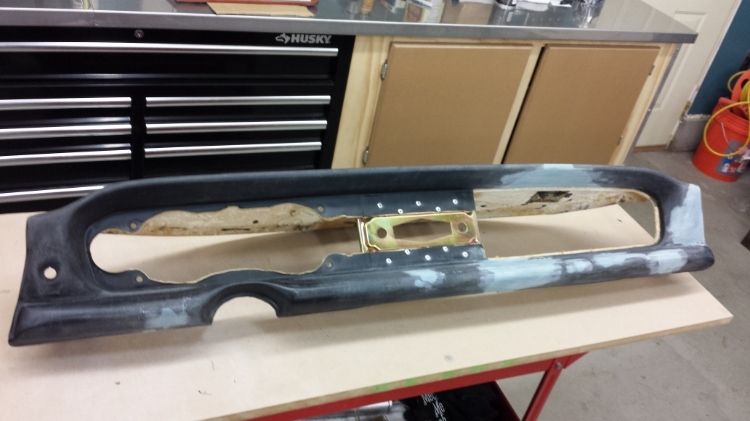
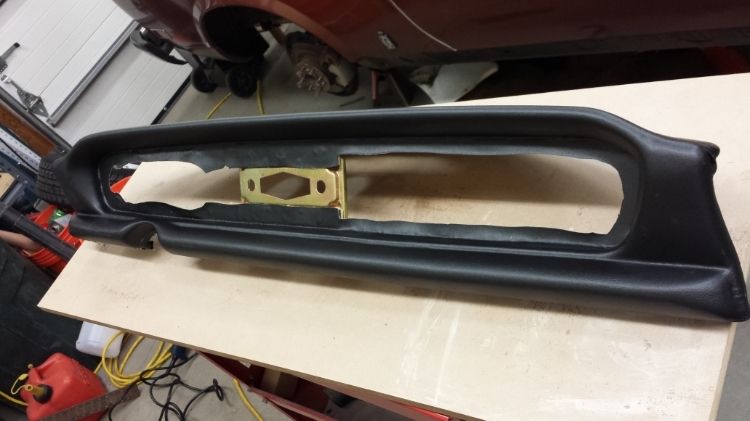
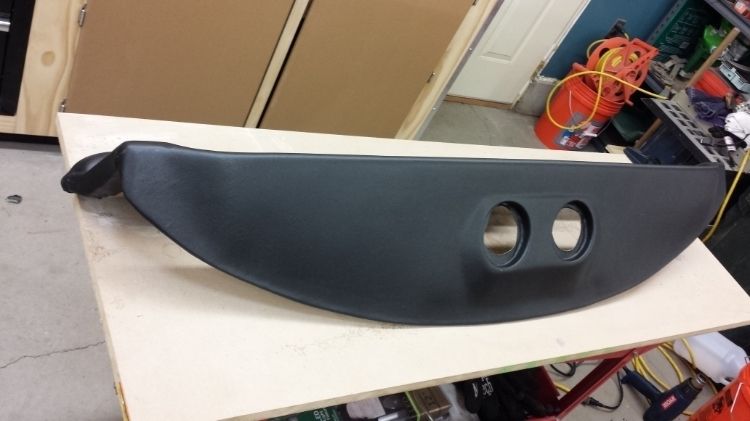
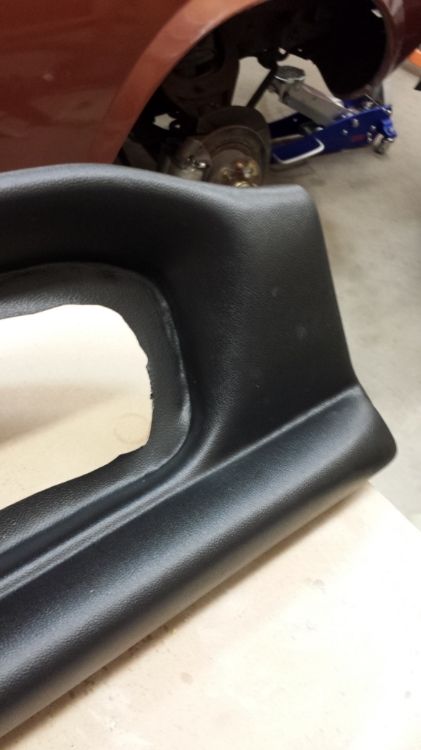
Like a lot of people my Spider had a badly cracked dash. I look into replacing it found they were pretty $$$. I also read in some places they didn't fit so well or required some shaping to make them fit. The dash caps seems to be OK for the price, but some people said they had a hard time getting the cap to lay down while the adhesive set up. So I went a different direction.

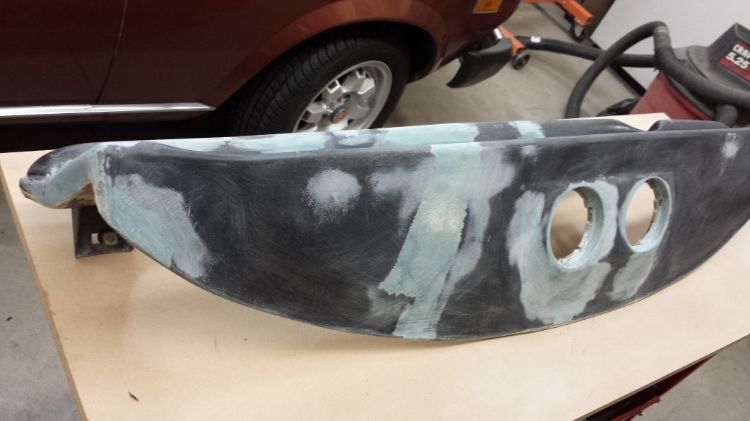
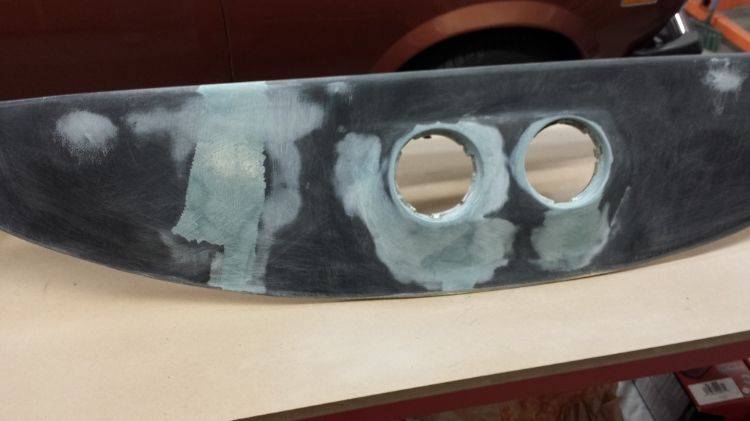
I peeled off all of the loose vinyl back to stable areas and cleaned everything real well. I then used a can of the regular Great Stuff spray foam and filled all the voids by smearing it into the old foam with a putty knife with just a slight build up. I then sanded and shaped flush. When I sanded the Great Stuff back it cut all the little bubbles open in the foam. This is where I then filled those areas with Evercoat Everglass short strand body filler (it has a little flex to it when total cured) and sanded it as before. The adhesive I like to use is 3M's Super Trim Adhesive #08090. I got the vinyl for the dash from a local deal that only deals in vinyls. The most important part to this project is to get good quality vinyl that will stretch 4-ways. I made the mistake of getting some cheap vinyl that would only stretch 2-ways and I had to rip it all off and start over. Also, you will need a heat gun to make the recessed areas. What do you think?
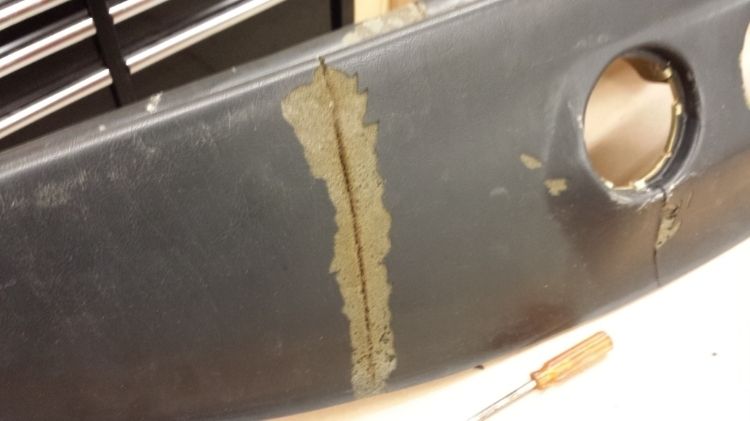
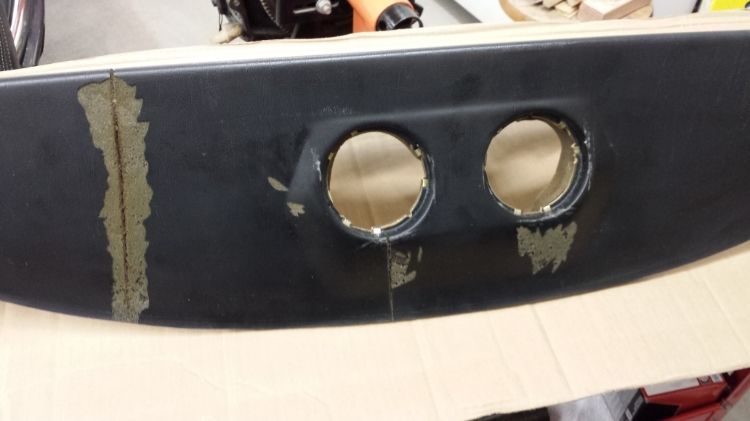
Image

Image

Image

Image

Image

Image

Image

Image

Image

Image

Re: My cracked dash repair

Posted: Fri Mar 13, 2015 9:14 pm
by focodave
That's mighty damned impressive.
You could probably do that as a side-business.
Nice job!

Re: My cracked dash repair

Posted: Fri Mar 13, 2015 10:52 pm
by younkin1
Hi Focodave,

Thanks for the compliment. I'll do a better job of documenting the steps on the next one which will probably be an X1/9 dash.

Re: My cracked dash repair

Posted: Fri Mar 13, 2015 11:19 pm
by DieselSpider
Let see if we can get the images to display:

Image

Image

Image

Image

Image

Image

Image

Image

Image

Image

That's better - Good job!

Re: My cracked dash repair

Posted: Fri Mar 13, 2015 11:38 pm
by younkin1
DieselSpider!

What was I doing wrong? Thanks a lot buddy!!!
Clearly I'm a newb.....

Re: My cracked dash repair

Posted: Sat Mar 14, 2015 12:11 am
by So Cal Mark
you did a very nice job on that. Have you fitted the cluster and glove box door yet? Many of the recovered dashes cause interference issues with the wood inserts

Re: My cracked dash repair

Posted: Sat Mar 14, 2015 1:06 am
by younkin1
Hi Mark,

I did do a rough fit of them already and even though the material is thin, it did make things a little tighter. I suspect I may need to do a little reworking on them too. Right now I'm just trying to simplify some of the dash wiring and replace a leaking heater core and water valve. (Side question if anyone knows- Were all spider pre-wire for power windows, also were they a dealer installed option? Just curious... I removed all the wiring for them to make things a little cleaner under the dash and center console). I'm also reworking all the the heater/ventilation controls and cable. Basically the entire interior :lol:

Re: My cracked dash repair

Posted: Sat Mar 14, 2015 11:29 am
by spider2081
Great dash repair. You must be a person of great patience.

Re: My cracked dash repair

Posted: Sat Mar 14, 2015 12:29 pm
by younkin1
spider2081 wrote:Great dash repair. You must be a person of great patience.
Hi Spider2081,
I think I have about 8 hours into it. But that includes the first two attempts using the cheap (wrong) vinyl. Third times a charm.
When I finally had the correct good vinyl it took me about 3 hours to apply it. Thanks for the compliment.

Re: My cracked dash repair

Posted: Sat Mar 14, 2015 12:30 pm
by younkin1
So Cal Mark wrote:you did a very nice job on that. Have you fitted the cluster and glove box door yet? Many of the recovered dashes cause interference issues with the wood inserts
Hi Mark,

I did do a rough fit of them already and even though the material is thin, it did make things a little tighter. I suspect I may need to do a little reworking on them too. Right now I'm just trying to simplify some of the dash wiring and replace a leaking heater core and water valve. (Side question if anyone knows- Were all spider pre-wire for power windows, also were they a dealer installed option? Just curious... I removed all the wiring for them to make things a little cleaner under the dash and center console). I'm also reworking all the the heater/ventilation controls and cable. Basically the entire interior :lol:

Re: My cracked dash repair

Posted: Sat Mar 14, 2015 12:33 pm
by younkin1
DieselSpider wrote:Let see if we can get the images to display:

That's better - Good job!
DieselSpider!

What was I doing wrong? Thanks a lot buddy!!!
Clearly I'm a newb.....

Re: My cracked dash repair

Posted: Sat Mar 14, 2015 12:33 pm
by younkin1
focodave wrote:That's mighty damned impressive.
You could probably do that as a side-business.
Nice job!
Hi Focodave,

Thanks for the compliment. I'll do a better job of documenting the steps on the next one which will probably be an X1/9 dash.

Re: My cracked dash repair

Posted: Sat Mar 14, 2015 1:05 pm
by garion
For the record, it looks like you had double [img] tags...

Re: My cracked dash repair

Posted: Sat Mar 14, 2015 1:33 pm
by younkin1
garion wrote:For the record, it looks like you had double [img] tags...
Hi Garion,

Double images? What do you mean? Sorry I'm real new to this forum stuff. I'm still trying to figure it out.

Re: My cracked dash repair

Posted: Sat Mar 14, 2015 8:55 pm
by georgeramos
What is the proper vinyl and what filler did you use?

Thanks, great job!