I was looking to upgrade my headlights with relays. I am sure glad my son talked me into buying AC's relay kit instead of buying relays and wire myself to save a few dollars. This was an excellent product. It is well made; the wires cut to the length required with professional ends and put in a package with short 1 page directions. I have increased voltage to headlights from 12.55V with key on, motor not running, to 13.77V.. those old sealed beam lights are noticeable brighter. I recommend this upgrade to all those persons thinking about it or not sure about doing it.
Head Light Relay Kit
-
gandyrail
- Posts: 47
- Joined: Wed Jun 17, 2015 12:39 pm
- Your car is a: 1981 2000
Head Light Relay Kit
I was looking to upgrade my headlights with relays. I am sure glad my son talked me into buying AC's relay kit instead of buying relays and wire myself to save a few dollars. This was an excellent product. It is well made; the wires cut to the length required with professional ends and put in a package with short 1 page directions. I have increased voltage to headlights from 12.55V with key on, motor not running, to 13.77V.. those old sealed beam lights are noticeable brighter. I recommend this upgrade to all those persons thinking about it or not sure about doing it.
-
AriK
- Patron 2018

- Posts: 1149
- Joined: Sat Apr 02, 2011 7:58 pm
- Your car is a: 1979 Fiat Spider
- Location: Montreal Canada
Re: Head Light Relay Kit
+1 on that! 
-
RRoller123

- Patron 2020
- Posts: 8179
- Joined: Sun Nov 13, 2011 2:04 pm
- Your car is a: 1980 FI SPIDER 2000
- Location: SAGAMORE BEACH, MA USA
Re: Head Light Relay Kit
+1 too! I did it by buying the parts and just figuring it out, and it cost way more than the kit in the end.  But the sealed beams are so strong now that they compare with our 2011 Malibu and there is no need to upgrade them to halogen imho.
'80 FI Spider 2000
'74 and '79 X1/9 (past)
'75 BMW R75/6
2011 Chevy Malibu (daily driver)
2010 Chevy Silverado 2500HD Ext Cab 4WD/STD BED
2002 Edgewater 175CC 80HP 4-Stroke Yamaha
2003 Jaguar XK8
2003 Jaguar XKR
2021 Jayco 22RB
2019 Bianchi Torino Bicycle
'74 and '79 X1/9 (past)
'75 BMW R75/6
2011 Chevy Malibu (daily driver)
2010 Chevy Silverado 2500HD Ext Cab 4WD/STD BED
2002 Edgewater 175CC 80HP 4-Stroke Yamaha
2003 Jaguar XK8
2003 Jaguar XKR
2021 Jayco 22RB
2019 Bianchi Torino Bicycle
-
4uall

- Posts: 4145
- Joined: Mon Sep 26, 2011 12:09 pm
- Your car is a: 1980 Fiat Pininfarina Spider 2000 F.I.
- Location: Ottawa, Ontario, Canada
Re: Head Light Relay Kit
any chance of a step by step directions/pictures 
Jay
Fiona
1980 FI 2000 Spider
ITZEBTZE
https://goo.gl/photos/eNKaX7hrXhBu9fmp6
FINN (FN-2187)
2014 Jeep Wrangler Sport
MYTHERPY
Fiona
1980 FI 2000 Spider
ITZEBTZE
https://goo.gl/photos/eNKaX7hrXhBu9fmp6
FINN (FN-2187)
2014 Jeep Wrangler Sport
MYTHERPY
-
RRoller123
- Patron 2020
- Posts: 8179
- Joined: Sun Nov 13, 2011 2:04 pm
- Your car is a: 1980 FI SPIDER 2000
- Location: SAGAMORE BEACH, MA USA
Re: Head Light Relay Kit
No, I have no idea what I did, I just kept hooking up wires until it worked. There was an intermediate step that involved our kitchen blender, but I had to take it out, as 5:00 p.m. arrived.
'80 FI Spider 2000
'74 and '79 X1/9 (past)
'75 BMW R75/6
2011 Chevy Malibu (daily driver)
2010 Chevy Silverado 2500HD Ext Cab 4WD/STD BED
2002 Edgewater 175CC 80HP 4-Stroke Yamaha
2003 Jaguar XK8
2003 Jaguar XKR
2021 Jayco 22RB
2019 Bianchi Torino Bicycle
'74 and '79 X1/9 (past)
'75 BMW R75/6
2011 Chevy Malibu (daily driver)
2010 Chevy Silverado 2500HD Ext Cab 4WD/STD BED
2002 Edgewater 175CC 80HP 4-Stroke Yamaha
2003 Jaguar XK8
2003 Jaguar XKR
2021 Jayco 22RB
2019 Bianchi Torino Bicycle
-
AriK
- Patron 2018
- Posts: 1149
- Joined: Sat Apr 02, 2011 7:58 pm
- Your car is a: 1979 Fiat Spider
- Location: Montreal Canada
Re: Head Light Relay Kit
Hell of alot motivating if you get AR's kit which is made by Greg Smith. He has everything so calculated from wire lengths to fit exactly around Fiona's engine bay, to wire gauge to heat shrink to to to +++. His instructions are so short and sweet that your son can plug & play it while we sit back and have a few brews.4uall wrote:any chance of a step by step directions/pictures
I hate to admit but i would not have bothered doing it if it was not for the kit.
-
RRoller123
- Patron 2020
- Posts: 8179
- Joined: Sun Nov 13, 2011 2:04 pm
- Your car is a: 1980 FI SPIDER 2000
- Location: SAGAMORE BEACH, MA USA
Re: Head Light Relay Kit
Brad's new book has a good wiring diagram for the headlight relay upgrade on page 167. Won't copy it here for obvious copyright reasons.
'80 FI Spider 2000
'74 and '79 X1/9 (past)
'75 BMW R75/6
2011 Chevy Malibu (daily driver)
2010 Chevy Silverado 2500HD Ext Cab 4WD/STD BED
2002 Edgewater 175CC 80HP 4-Stroke Yamaha
2003 Jaguar XK8
2003 Jaguar XKR
2021 Jayco 22RB
2019 Bianchi Torino Bicycle
'74 and '79 X1/9 (past)
'75 BMW R75/6
2011 Chevy Malibu (daily driver)
2010 Chevy Silverado 2500HD Ext Cab 4WD/STD BED
2002 Edgewater 175CC 80HP 4-Stroke Yamaha
2003 Jaguar XK8
2003 Jaguar XKR
2021 Jayco 22RB
2019 Bianchi Torino Bicycle
-
KevAndAndi

- Posts: 531
- Joined: Fri Oct 03, 2014 12:14 pm
- Your car is a: 1981 Fiat Spider 2000
- Location: Chatham, NJ
Re: Head Light Relay Kit
+1 on Greg Smith's relay kit. It is easy and elegant.
Kevin
1981 Spider 2000
1981 Spider 2000
-
4uall
- Posts: 4145
- Joined: Mon Sep 26, 2011 12:09 pm
- Your car is a: 1980 Fiat Pininfarina Spider 2000 F.I.
- Location: Ottawa, Ontario, Canada
Re: Head Light Relay Kit
the reason I ask is that I have these yet no instructions  not as skilled in the wiring etc as I like to be

Jay
Fiona
1980 FI 2000 Spider
ITZEBTZE
https://goo.gl/photos/eNKaX7hrXhBu9fmp6
FINN (FN-2187)
2014 Jeep Wrangler Sport
MYTHERPY
Fiona
1980 FI 2000 Spider
ITZEBTZE
https://goo.gl/photos/eNKaX7hrXhBu9fmp6
FINN (FN-2187)
2014 Jeep Wrangler Sport
MYTHERPY
-
RRoller123
- Patron 2020
- Posts: 8179
- Joined: Sun Nov 13, 2011 2:04 pm
- Your car is a: 1980 FI SPIDER 2000
- Location: SAGAMORE BEACH, MA USA
Re: Head Light Relay Kit
Jay: Look up the action of the particular relay you have on the web, i.e. find which leg triggers in the "switch", or "pulls it in". Then use the existing wires that supply power to the lights as the triggers, and run a new power feed from a power source to the load side of the relay, typically from the alternator stud. It isn't all that hard. If I can do it, you certainly can. Brad's diagram is really good, check it out. Just wear safety glasses and linesman's gloves.
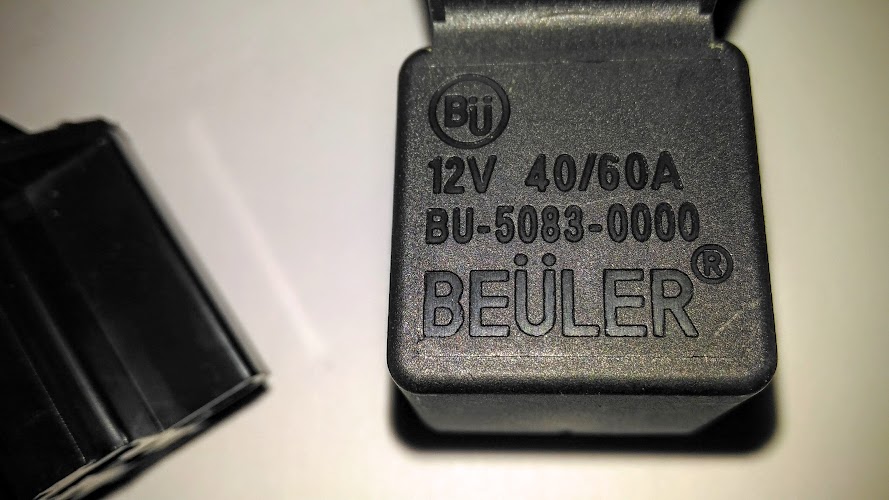
Can you post a pic of the back of the relays?
Can you post a pic of the back of the relays?
'80 FI Spider 2000
'74 and '79 X1/9 (past)
'75 BMW R75/6
2011 Chevy Malibu (daily driver)
2010 Chevy Silverado 2500HD Ext Cab 4WD/STD BED
2002 Edgewater 175CC 80HP 4-Stroke Yamaha
2003 Jaguar XK8
2003 Jaguar XKR
2021 Jayco 22RB
2019 Bianchi Torino Bicycle
'74 and '79 X1/9 (past)
'75 BMW R75/6
2011 Chevy Malibu (daily driver)
2010 Chevy Silverado 2500HD Ext Cab 4WD/STD BED
2002 Edgewater 175CC 80HP 4-Stroke Yamaha
2003 Jaguar XK8
2003 Jaguar XKR
2021 Jayco 22RB
2019 Bianchi Torino Bicycle
-
DieselSpider
- Posts: 2130
- Joined: Wed Dec 24, 2014 10:21 pm
- Your car is a: 1978 124 Spider with Isuzu Turbo Diesel
Re: Head Light Relay Kit
The ones have I used have 4 terminals labeled and oriented as follows:
87..._
86.|...| 85
30...|
30 = Unswitched power from battery
87 = Power going to lights
86 = Power coming from existing light switch
85 = Ground.
Currently power comes from the dash switch and flows to each light using separate wires however that power is now going to only be used to run terminal 86 on the relays to activate the electromagnet which gets its ground from terminal 85. You can cut the existing wire going from the headlight switch to the individual headlamp or find the existing inline connector to disconnect and re route to the relay. There should be 2 power feed to each headlamp with 1 for the low beam and the other for the high beam so 4 relays would be needed if you keep them separate.
A new fused power source will be connected to terminal 30 and the existing wire that you cut or disconnected going to the headlamp will be connected to terminal number 87.
Its only 12 volts DC off an automotive battery so you won't need lineman's gloves to prevent electrocution but may want to disconnect the battery to prevent accident short circuits while working on things especially if you wear metal jewelry since a metal chain, band or ring can get hot enough to burn you when powered up by a car battery just like the cigarette lighter. You can choose to do only one at a time so if you make a mistake you won't be overwhelmed with totally non-functional headlamps.
If any of this makes you feel terribly uneasy then get one of the fine kits out there. Doing it yourself does provide a level of satisfaction and a greater knowledge of how this works. Either way is good if your meticulous and pay attention to detail. Don't do it when your pressed for time, tired or feeling unwell.
Here is a simple video explanation of how an automotive relay works which covers the 5 terminal relay however what is presented about terminal 30, 85, 86 and 87 applies also to the 4 terminal relay by just ignoring terminal 87A:
https://www.youtube.com/watch?v=Tw9QkkT2ptU
-
RRoller123
- Patron 2020
- Posts: 8179
- Joined: Sun Nov 13, 2011 2:04 pm
- Your car is a: 1980 FI SPIDER 2000
- Location: SAGAMORE BEACH, MA USA
Re: Head Light Relay Kit
+1 on that, good explanation! Only thing I would add is that it can be done with just 2 relays, one for Hi one for LO. However 4 would cut the relay loads in half. Hmmmm..... another good idea.
(I was only kidding about the linesman's gloves....)
(I was only kidding about the linesman's gloves....)
'80 FI Spider 2000
'74 and '79 X1/9 (past)
'75 BMW R75/6
2011 Chevy Malibu (daily driver)
2010 Chevy Silverado 2500HD Ext Cab 4WD/STD BED
2002 Edgewater 175CC 80HP 4-Stroke Yamaha
2003 Jaguar XK8
2003 Jaguar XKR
2021 Jayco 22RB
2019 Bianchi Torino Bicycle
'74 and '79 X1/9 (past)
'75 BMW R75/6
2011 Chevy Malibu (daily driver)
2010 Chevy Silverado 2500HD Ext Cab 4WD/STD BED
2002 Edgewater 175CC 80HP 4-Stroke Yamaha
2003 Jaguar XK8
2003 Jaguar XKR
2021 Jayco 22RB
2019 Bianchi Torino Bicycle
-
Peteracs
Re: Head Light Relay Kit
Hi All
One of my first posts, so be kind....!
My view on pros and cons of 2 versus 4 relays
2 Relays - less clutter and depending on where you put them, less space required, check the current rating of the main connections that they can handle the current of the two lights with some to spare to improve reliability.
4 Relays - more space required, less current going through main terminals and if one of them fails you still have one light to get you home.....
I guess you pays your money etc......
Peter
-
gandyrail
- Posts: 47
- Joined: Wed Jun 17, 2015 12:39 pm
- Your car is a: 1981 2000
Re: Head Light Relay Kit
As far as directions: Relay are placed on the drivers side...wires are pluged into bullet connections to head light on the fenders each side and get new power lead from alternator stud. Put the relay new ground wire to the cluster on the fender drivers side - I had to buy a 2 way female to male male adapter as my ground star was full.
I attached the two relays on the fender with short 3/16" long self tapping sheet metal screws after I knew everything worked. I placed relays above where the big green battery wire turns a 90 on the drivers front fender on my 81.
I was able to tuck wires from the relays into the wire loom clips on the fender on the drivers side. It pretty much looks like it was always on the car and not a add on. The passenger side I ran wire thru only one factory clip in front of the overflow bottle pretty much vertical.
To get wire to the passenger side head light; I drilled 2 holes to allow the wire to run under the windshield cowl and installed I think 7/16" grommets and tape the wires together for several inches off the fire wall on each side made it looks like it came from the factory. There might be enough room to share the existing holes used by the washer fluid hose on the drivers side, and to share the grommet for the wiper motor wires on the passenger side .. I went with new holes and grommets. I made sure the wire under the cowling was pulled tight and placed up against the front of fire wall for no possibility of getting caught by the wiper arm movements. I put a small chunk of two sided tape in the middle to hold the wire under the cowling but I got it pretty tight. The only wire I had to tie down was the new power run to alternator stud. Also The directions said to remove a fuse not needed for passenger headlight but I have plans for that unused hot wire on the passenger side. I taped it off and secured it to avoid a live short. I hope I can put a relay on that for some fog lights in the future.
Last edited by gandyrail on Fri Feb 05, 2016 6:04 pm, edited 1 time in total.
-
dreavis
- Posts: 111
- Joined: Wed Apr 08, 2015 2:32 am
- Your car is a: 1977 Fiat 1800
Re: Head Light Relay Kit
Let's say that your only electrical wiring experience has come from installing some ceiling fans and a garage door opener or two. How long would it take to complete this project with the relay kit? Also, how much would it cost to have an experienced auto mechanic install the kit?
I'm just trying to get a sense of the time and frustration factor.
I'm just trying to get a sense of the time and frustration factor.